
文章分为三部分:
一、 配置 Github Pages
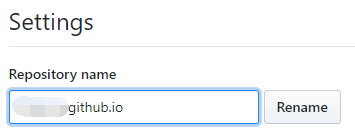
首先在 Github 新建一个新的 repository,命名为你的 Github-ID.github.io 。 或者将原有的repository重命名为 Github-ID.github.io 。
具体操作如下:
点击Settings

重命名
设置Github Pages
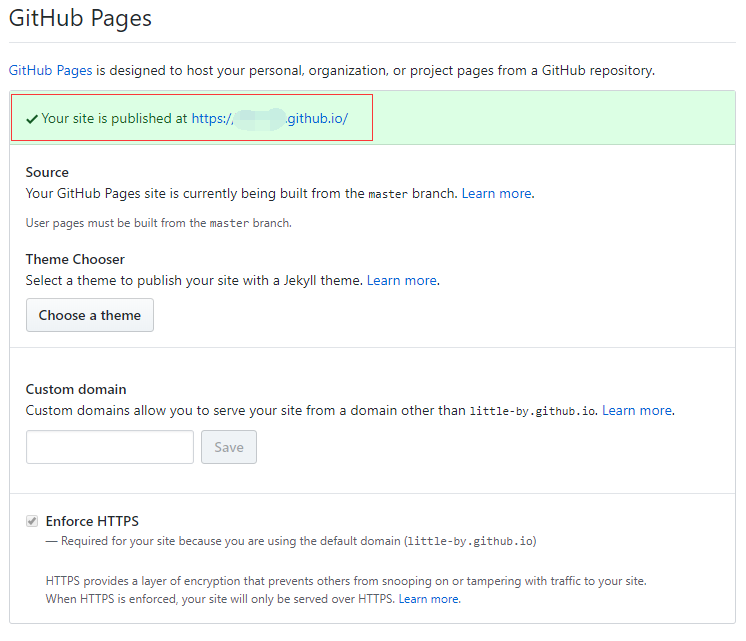
打开方框中的网址就可以看到你的页面了。
二、 配置 Hexo
¶安装 Git Bash
去官网下载, 下载完成后一路next安装,安装后可以打开 git bash, 输入 git version 验证是否安装好。
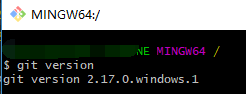
这个是常用的git工具,这里用来向github pages部署自己的网页,第一次使用需要配置github账户信息。
¶安装 Node.js
去 Node.js 官网 下载,最好下载LTS 长期维护版的。
打开下载好的msi文件一路next,过程中会有一个 Add to Path 选项,勾选上。你也可以选择之后自己配置环境变量。
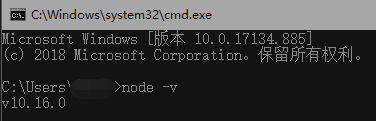
安装完之后打开cmd, 输入 node -v 验证是否成功。
¶安装 Hexo
在cmd输入以下命令安装Hexo
npm i -g hexo-cli
cd到准备存放Hexo文件的目录
hexo init
然后就会看到如下目录
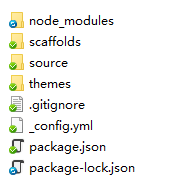
然后将git链接替换为自己的,找到第一步创建的Repository。
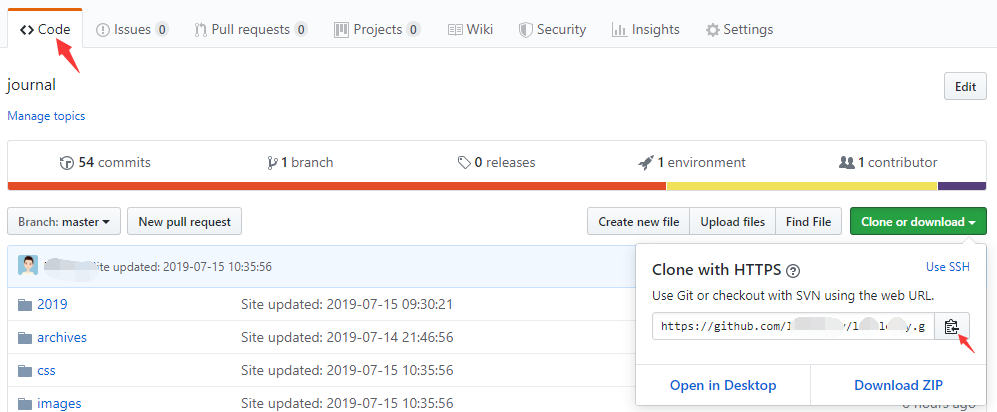
在文件目录下找到 _config.yml, 在deploy的位置修改如下:
deploy:
    type: git
    repo: https://github.com/<yourID>/<yourID>.github.io.git
    branch: master
其中repo 就填写刚才copy的git链接。
然后在博客根目录(就是运行 hexo init的文件夹)构建部署Hexo Blog。
hexo g
hexo d
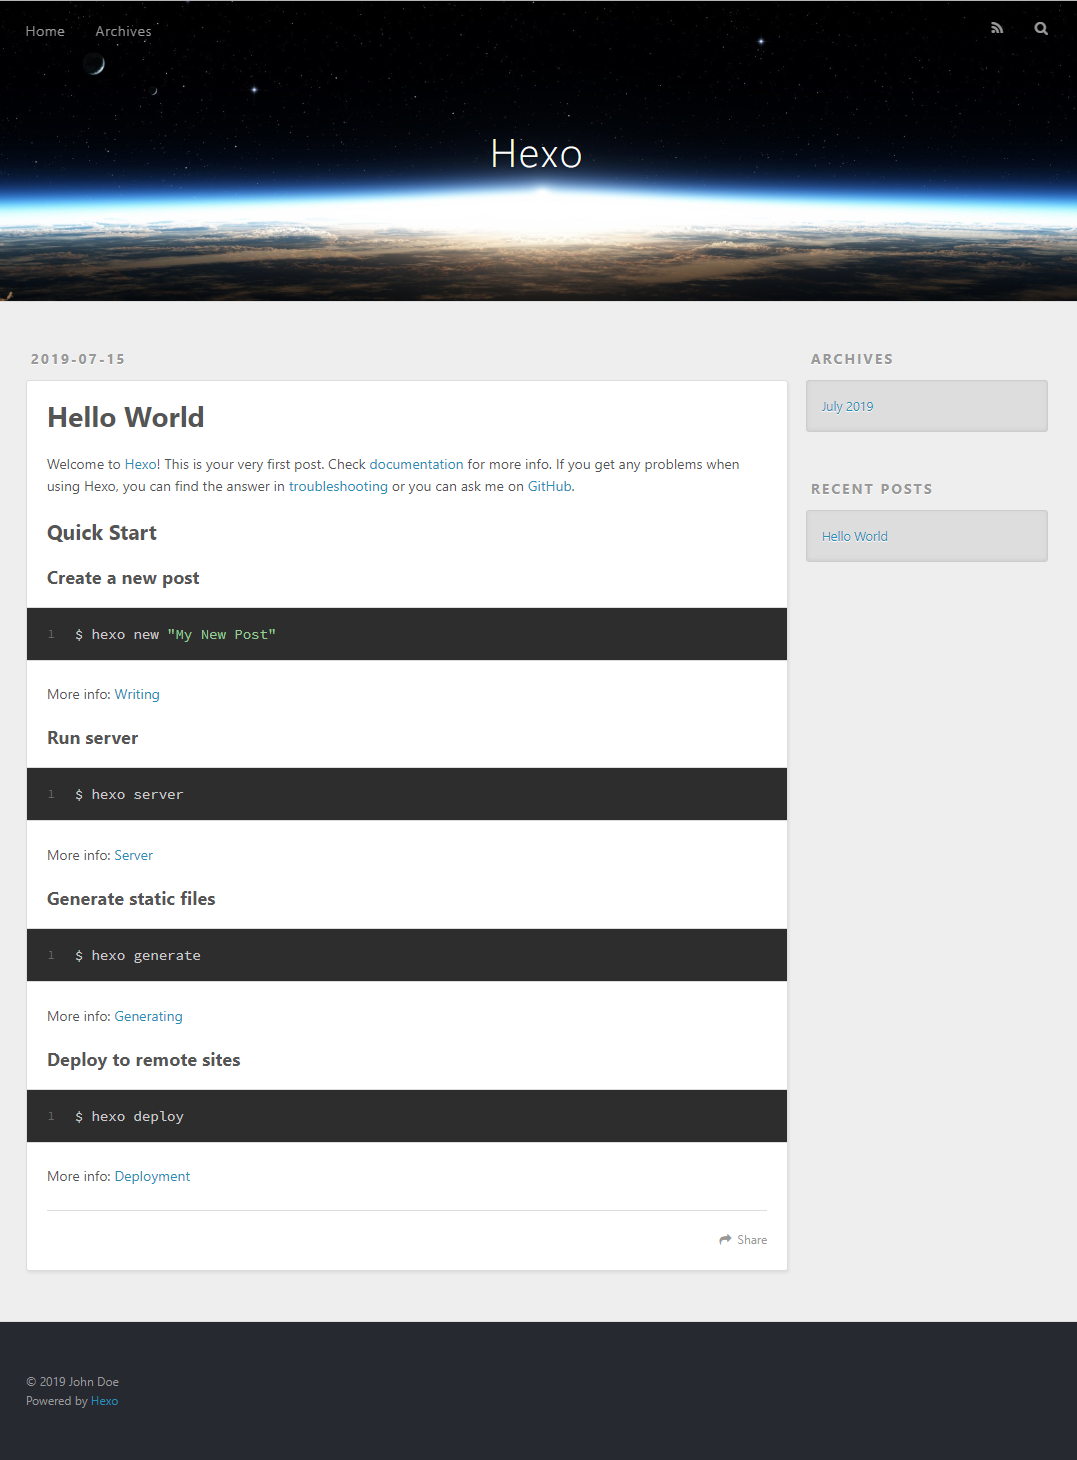
访问 https://<yourID>.github.io,就可以看到部署好的网页。
三、 安装 Next 主题并美化
¶安装NexT
实话讲Hexo默认的主题landscape是有点丑的,这里使用了一个常用且美观的主题NexT。
在博客根目录运行以下命令
git clone https://github.com/theme-next themes/next
会看到NexT主题被安装到theme文件夹下,然后在博客根目录下切换成NexT。
修改 _config.yml 文件
theme: next
重新构建部署
hexo clean
hexo g
hexo d
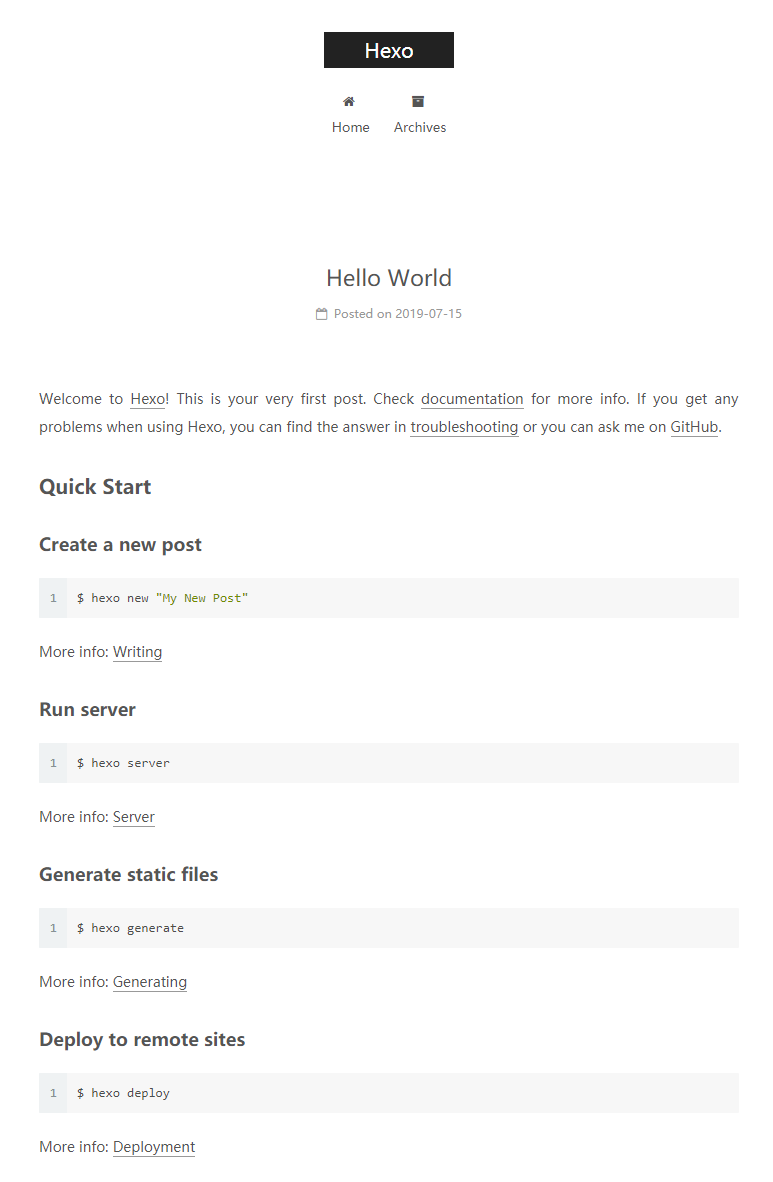
再次访问 https://<yourID>.github.io,就可以看到部署好的网页,NexT 安装完毕。
¶美化 NexT
¶1. 设置主题风格
在 themes/next/_config.yml 文件,修改如下:
# Schemes
#scheme: Muse
#scheme: Mist
scheme: Pisces
#scheme: Gemini
¶2. 中文界面、时区等基本配置
在根目录_config.yml中,修改site信息
title: little-by
subtitle: your subtitle
description: your description
keywords: your keywords
author: xxx
language: zh-CN
timezone: Asia/Shanghai
¶3. 博客背景图片
将背景图片放到 themes\next\source\images 。打开 themes\next\source\css\ _custom\custom.styl, 添加如下css代码。
body {
    background:url(/images/bg/qingli6.jpg);
    background-repeat: no-repeat;
    background-attachment:fixed;
    background-position:50% 50%;
}
¶4. 设置动态背景canvas-nest
在 theme/next 目录下运行
git clone https://github.com/theme-next/theme-next-canvas-nest source/lib/canvas-nest
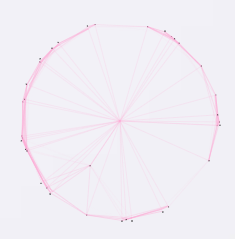
然后将 theme/next/_config.yml 中关于 canvas-nest 的部分配置如下:
canvas_nest:
    enable: true
    onmobile: true # display on mobile or not
    color: "255,153,204" # RGB values, use ',' to separate
    opacity: 0.8 # the opacity of line: 0~1
    zIndex: -1 # z-index property of the background
    count: 99 # the number of lines
效果如下:
¶5. 统计字数和阅读时长
在根目录运行
npm install hexo-symbols-count-time --save
在根目录_config.yml添加
symbols_count_time:
    symbols: true
    time: true
    total_symbols: true
    total_time: true
在theme/next/_config.yml添加
symbols_count_time:
    separated_meta: true
    item_text_post: true
    item_text_total: false
    awl: 4
    wpm: 275
¶6. 摘要
在文章中添加 <!--more--> , 在这之前的内容会当作摘要,显示在主页。
之后配置摘要配图,只会显示在主页,点击阅读全文后消失。
在theme/next/_config.yml修改
1 | excerpt_description: false |
然后在themes\next\layout\_macro\post.swig文件的if is_index和if post.description and theme.excerpt_description之间添加代码
1 | //图片外部的容器方框 |
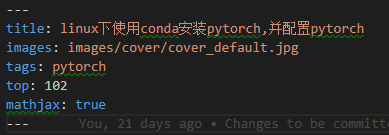
设置完后,每次写文章是在YAML头添加一行
images: images/cover/cover_default.jpg
¶7. 文章置顶
修改node_modules/hexo-generator-index/lib/generator.js
1 | ; |
设置完后,每次写文章是在YAML头添加一行
top: 102
top值越大越靠前
另外还可以给文章添加置顶标志,打开next\layout\_macro\post.swig文件,定位到<div class="post-meta">标签下,插入以下代码:
1 | {% if post.top > 100 %} //这个数值自己定,可以实现给多篇文章添加置顶标志 |
¶8. 打赏
将自己的微信和支付宝二维码图片放到themes\next\source\images文件夹下,然后配置theme/next/_config.yml
1 | reward_settings: |
¶9. LiveRe来必力评论区
到LiveRe官网注册一下,获得一个livere_uid,然后配置theme/next/_config.yml
livere_uid: xxxxxxxxxxxxx
可以在来必力的管理页面配置显示顺序等。
¶10. 显示数学公式
更改hexo的markdown渲染引擎,从hexo-renderer-marked改为hexo-renderer-kramed,在博客文件夹根目录下运行命令行,运行命令:
npm uninstall hexo-renderer-marked --save
npm install hexo-renderer-kramed --save
打开博客文件夹中的node_modules\kramed\lib\rules\inline.js文件,修改escape和em变量:
origin: escape: /^\\([\\`*{}\[\]()#$+\-.!_>])/
change to: escape: /^\\([`*\[\]()#$+\-.!_>])/
origin: em: /^\b_((?:__|[\s\S])+?)_\b|^\*((?:\*\*|[\s\S])+?)\*(?!\*)/
change to: em: /^\*((?:\*\*|[\s\S])+?)\*(?!\*)/
在next配置文件中将math变量取值改为true:
1 | # Math Equations Render Support |
在需要显示公式的文章的YAML头信息中打开mathjax开关:
1 | title: xxx |
¶11. 添加标签页面
在根目录使用新建一个页面,命名为 tags:
cd your-hexo-site
hexo new page tags
会在_posts文件夹下生成tags/index.md, 将其内容修改如下
1 |
|
修改 theme/next/_config.yml 如下
1 | menu: |
每次写文章是在YAML头添加一行
1 | -------- |
¶12. 文章阴影效果
修改 themes/next/source/css/_common/components/post/post-eof.styl, 添加
1 | .posts-expand { |
¶13. 文章前景透明
为了让网页背景更好的显示,需要将前景调成透明
博客根目录 themes\next\source\css\_schemes\Pisces\_layout.styl 文件 .content-wrap 标签下 background: white修改为:
1 | background: rgba(255,255,255,0.7); //0.7是透明度 |
¶14. 代码块自定义样式
修改 themes/next/source/css/_common/components/post/post-eof.styl, 添加
1 | code { |
¶15. 新建404界面
hexo new page 404
修改source\404\index.md
1 |
|
¶16. 点击鼠标出现爱心
新建love.js,复制以下代码
1 | !function(e,t,a){function n(){c(".heart{width: 10px;height: 10px;position: fixed;background: #f00;transform: rotate(45deg);-webkit-transform: rotate(45deg);-moz-transform: rotate(45deg);}.heart:after,.heart:before{content: '';width: inherit;height: inherit;background: inherit;border-radius: 50%;-webkit-border-radius: 50%;-moz-border-radius: 50%;position: fixed;}.heart:after{top: -5px;}.heart:before{left: -5px;}"),o(),r()}function r(){for(var e=0;e<d.length;e++)d[e].alpha<=0?(t.body.removeChild(d[e].el),d.splice(e,1)):(d[e].y--,d[e].scale+=.004,d[e].alpha-=.013,d[e].el.style.cssText="left:"+d[e].x+"px;top:"+d[e].y+"px;opacity:"+d[e].alpha+";transform:scale("+d[e].scale+","+d[e].scale+") rotate(45deg);background:"+d[e].color+";z-index:99999");requestAnimationFrame(r)}function o(){var t="function"==typeof e.onclick&&e.onclick;e.onclick=function(e){t&&t(),i(e)}}function i(e){var a=t.createElement("div");a.className="heart",d.push({el:a,x:e.clientX-5,y:e.clientY-5,scale:1,alpha:1,color:s()}),t.body.appendChild(a)}function c(e){var a=t.createElement("style");a.type="text/css";try{a.appendChild(t.createTextNode(e))}catch(t){a.styleSheet.cssText=e}t.getElementsByTagName("head")[0].appendChild(a)}function s(){return"rgb("+~~(255*Math.random())+","+~~(255*Math.random())+","+~~(255*Math.random())+")"}var d=[];e.requestAnimationFrame=function(){return e.requestAnimationFrame||e.webkitRequestAnimationFrame||e.mozRequestAnimationFrame||e.oRequestAnimationFrame||e.msRequestAnimationFrame||function(e){setTimeout(e,1e3/60)}}(),n()}(window,document); |
将 love.js文件放到路径 /themes/next/source/js/src 里
然后打开 \themes\next\layout_layout.swig 文件,在末尾(在前面引用会出现找不到的bug)添加以下代码:
1 | <!-- 页面点击小红心 --> |
¶16. 点击鼠标出现爆炸效果
在/themes/next/source/js/src下新建文件fireworks.js,并复制粘贴如下代码
1 | ;function updateCoords(e){pointerX=(e.clientX||e.touches[0].clientX)-canvasEl.getBoundingClientRect().left,pointerY=e.clientY||e.touches[0].clientY-canvasEl.getBoundingClientRect().top}function setParticuleDirection(e){var t=anime.random(0,360)*Math.PI/180,a=anime.random(50,180),n=[-1,1][anime.random(0,1)]*a;return{x:e.x+n*Math.cos(t),y:e.y+n*Math.sin(t)}}function createParticule(e,t){var a={};return a.x=e,a.y=t,a.color=colors[anime.random(0,colors.length-1)],a.radius=anime.random(16,32),a.endPos=setParticuleDirection(a),a.draw=function(){ctx.beginPath(),ctx.arc(a.x,a.y,a.radius,0,2*Math.PI,!0),ctx.fillStyle=a.color,ctx.fill()},a}function createCircle(e,t){var a={};return a.x=e,a.y=t,a.color="#F00",a.radius=0.1,a.alpha=0.5,a.lineWidth=6,a.draw=function(){ctx.globalAlpha=a.alpha,ctx.beginPath(),ctx.arc(a.x,a.y,a.radius,0,2*Math.PI,!0),ctx.lineWidth=a.lineWidth,ctx.strokeStyle=a.color,ctx.stroke(),ctx.globalAlpha=1},a}function renderParticule(e){for(var t=0;t<e.animatables.length;t++){e.animatables[t].target.draw()}}function animateParticules(e,t){for(var a=createCircle(e,t),n=[],i=0;i<numberOfParticules;i++){n.push(createParticule(e,t))}anime.timeline().add({targets:n,x:function(e){return e.endPos.x},y:function(e){return e.endPos.y},radius:0.1,duration:anime.random(1200,1800),easing:"easeOutExpo",update:renderParticule}).add({targets:a,radius:anime.random(80,160),lineWidth:0,alpha:{value:0,easing:"linear",duration:anime.random(600,800)},duration:anime.random(1200,1800),easing:"easeOutExpo",update:renderParticule,offset:0})}function debounce(e,t){var a;return function(){var n=this,i=arguments;clearTimeout(a),a=setTimeout(function(){e.apply(n,i)},t)}}var canvasEl=document.querySelector(".fireworks");if(canvasEl){var ctx=canvasEl.getContext("2d"),numberOfParticules=30,pointerX=0,pointerY=0,tap="mousedown",colors=["#FF1461","#18FF92","#5A87FF","#FBF38C"],setCanvasSize=debounce(function(){canvasEl.width=2*window.innerWidth,canvasEl.height=2*window.innerHeight,canvasEl.style.width=window.innerWidth+"px",canvasEl.style.height=window.innerHeight+"px",canvasEl.getContext("2d").scale(2,2)},500),render=anime({duration:1/0,update:function(){ctx.clearRect(0,0,canvasEl.width,canvasEl.height)}});document.addEventListener(tap,function(e){"sidebar"!==e.target.id&&"toggle-sidebar"!==e.target.id&&"A"!==e.target.nodeName&&"IMG"!==e.target.nodeName&&(render.play(),updateCoords(e),animateParticules(pointerX,pointerY))},!1),setCanvasSize(),window.addEventListener("resize",setCanvasSize,!1)}"use strict";function updateCoords(e){pointerX=(e.clientX||e.touches[0].clientX)-canvasEl.getBoundingClientRect().left,pointerY=e.clientY||e.touches[0].clientY-canvasEl.getBoundingClientRect().top}function setParticuleDirection(e){var t=anime.random(0,360)*Math.PI/180,a=anime.random(50,180),n=[-1,1][anime.random(0,1)]*a;return{x:e.x+n*Math.cos(t),y:e.y+n*Math.sin(t)}}function createParticule(e,t){var a={};return a.x=e,a.y=t,a.color=colors[anime.random(0,colors.length-1)],a.radius=anime.random(16,32),a.endPos=setParticuleDirection(a),a.draw=function(){ctx.beginPath(),ctx.arc(a.x,a.y,a.radius,0,2*Math.PI,!0),ctx.fillStyle=a.color,ctx.fill()},a}function createCircle(e,t){var a={};return a.x=e,a.y=t,a.color="#F00",a.radius=0.1,a.alpha=0.5,a.lineWidth=6,a.draw=function(){ctx.globalAlpha=a.alpha,ctx.beginPath(),ctx.arc(a.x,a.y,a.radius,0,2*Math.PI,!0),ctx.lineWidth=a.lineWidth,ctx.strokeStyle=a.color,ctx.stroke(),ctx.globalAlpha=1},a}function renderParticule(e){for(var t=0;t<e.animatables.length;t++){e.animatables[t].target.draw()}}function animateParticules(e,t){for(var a=createCircle(e,t),n=[],i=0;i<numberOfParticules;i++){n.push(createParticule(e,t))}anime.timeline().add({targets:n,x:function(e){return e.endPos.x},y:function(e){return e.endPos.y},radius:0.1,duration:anime.random(1200,1800),easing:"easeOutExpo",update:renderParticule}).add({targets:a,radius:anime.random(80,160),lineWidth:0,alpha:{value:0,easing:"linear",duration:anime.random(600,800)},duration:anime.random(1200,1800),easing:"easeOutExpo",update:renderParticule,offset:0})}function debounce(e,t){var a;return function(){var n=this,i=arguments;clearTimeout(a),a=setTimeout(function(){e.apply(n,i)},t)}}var canvasEl=document.querySelector(".fireworks");if(canvasEl){var ctx=canvasEl.getContext("2d"),numberOfParticules=30,pointerX=0,pointerY=0,tap="mousedown",colors=["#FF1461","#18FF92","#5A87FF","#FBF38C"],setCanvasSize=debounce(function(){canvasEl.width=2*window.innerWidth,canvasEl.height=2*window.innerHeight,canvasEl.style.width=window.innerWidth+"px",canvasEl.style.height=window.innerHeight+"px",canvasEl.getContext("2d").scale(2,2)},500),render=anime({duration:1/0,update:function(){ctx.clearRect(0,0,canvasEl.width,canvasEl.height)}});document.addEventListener(tap,function(e){"sidebar"!==e.target.id&&"toggle-sidebar"!==e.target.id&&"A"!==e.target.nodeName&&"IMG"!==e.target.nodeName&&(render.play(),updateCoords(e),animateParticules(pointerX,pointerY))},!1),setCanvasSize(),window.addEventListener("resize",setCanvasSize,!1)}; |
在\themes\next\layout_layout.swig文件的
标签最后添加:1 | {% if theme.fireworks %} |
修改 /themes/next/_config.yml
1 | # Fireworks |
¶17. 文章生成对应资源路径并修改默认文件名
在根目录的_config.yml中修改
‘’’
post_asset_folder: true
‘’’
这样每次新建文章,都会在source/_posts目录下创建一个同名目录
在根目录的_config.yml中修改
‘’’
new_post_name: :year-:month-:day-:title.md # File name of new posts
‘’’
这样文章文件名会默认加上日期
以下是我使用Butterfly主题之后的配置
¶18. Katex
npm un hexo-renderer-marked --save # 如果有安裝這個的話,卸載
npm un hexo-renderer-kramed --save # 如果有安裝這個的話,卸載
npm un hexo-math --save
npm i hexo-renderer-markdown-it --save # 需要安裝這個渲染插件
npm install @neilsustc/markdown-it-katex --save #需要安裝這個katex插件
修改 hexo 的根目錄的 _config.yml
markdown:
    plugins:
        - plugin:
        name: '@neilsustc/markdown-it-katex'
        options:
            strict: false
¶19. mathjax
butterfly的config.yml中打开mathjax
mathjax:
enable: true
per_page: false # 这里为true则默认每一个博客上都用mathjax,如果为false,则在每个文章头部用 mathjax:true设置。
¶20. 脚注
安装 hexo-renderer-markdown-it,并在hexo个目录的_config.yml里配置如下:
markdown:
# 渲染设置
render:
    # 置为true时,html内容保持不变;置为false时,html内容将被转义成普通字符串
    html: true
    # 是否生成与XHTML完全兼容的标签(虽然我不懂是什么意思)
    xhtmlOut: false
    # 置为true时,每个换行符都被渲染成一个<br>(即Hexo的默认表现);置为false时,只有空行才会被渲染为<br>(GFM的默认表现)
    breaks: true
    # 是否自动识别链接并把它渲染成链接
    linkify: true
    # 是否自动识别印刷格式(意思是把(c)渲染为©这样的)
    typographer: true
    # 如果typographer被设置为true,则该选项用于设置将dumb quotes("")自动替换为smart quotes
    quotes: '“”‘’'
# 设置所需插件
plugins:
    - markdown-it-abbr
    - markdown-it-footnote
    - markdown-it-ins
    - markdown-it-sub
    - markdown-it-sup
# 锚点设置(因为我没有尝试相关内容,所以就不翻译相关说明了)
anchors:
    level: 2
    collisionSuffix: 'v'
    permalink: true
    permalinkClass: header-anchor
    permalinkSymbol: 
在实际使用时正文用\[^ref_name\],然后在最后用
参考文献:
\[^ref_name\]: xxxx
注意 冒号很重要, ref_name不能有空格、tab或换行符,每条脚注的前后都应该有空行。